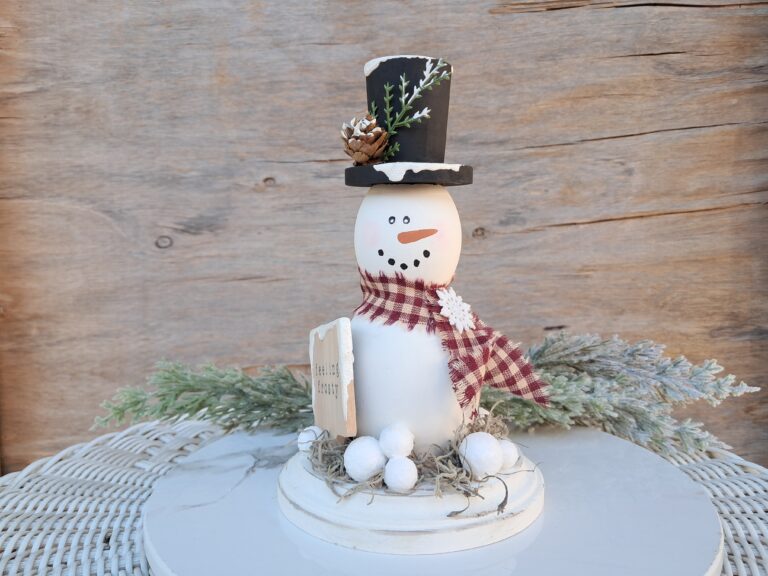
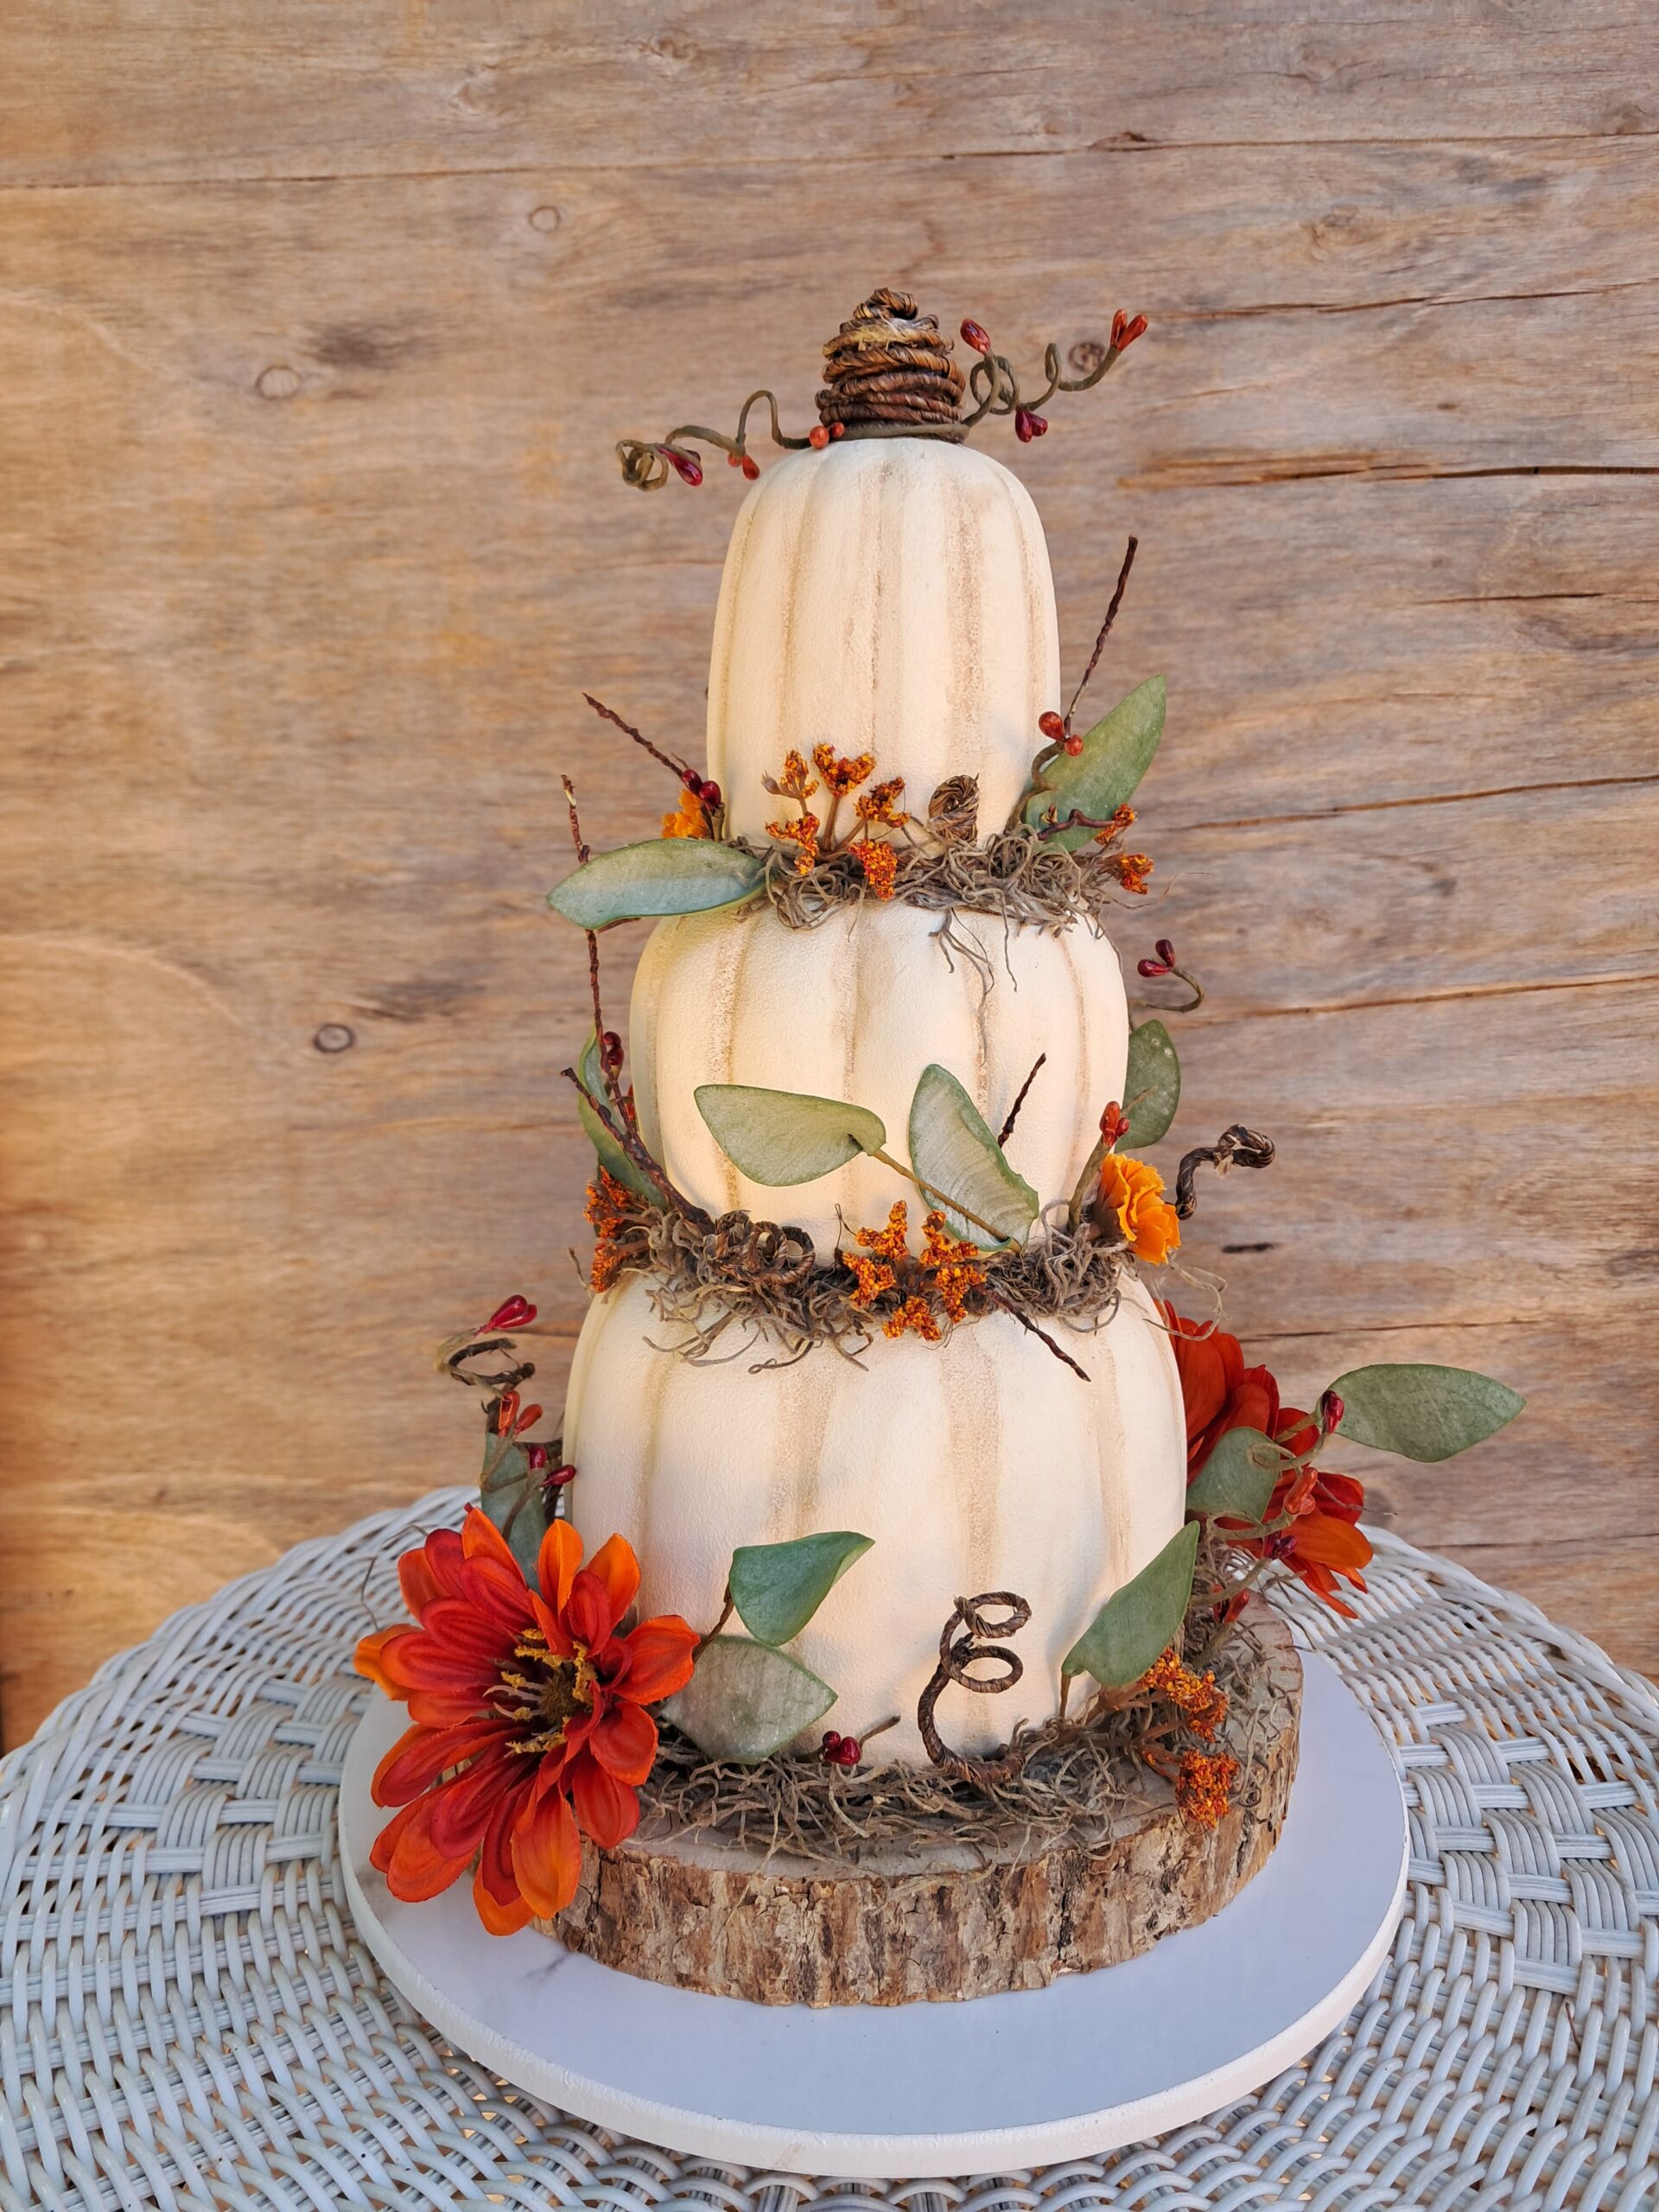
Pumpkin Stack Makeover
There’s nothing more charming in the fall than a stack of pumpkins. When I found a set of the viral Dollar Tree stackable pumpkins, I was excited at the prospect of a makeover. This post details exactly how the stack went from blah to gorgeous!
You can watch this YouTube video or continue reading below for more details.
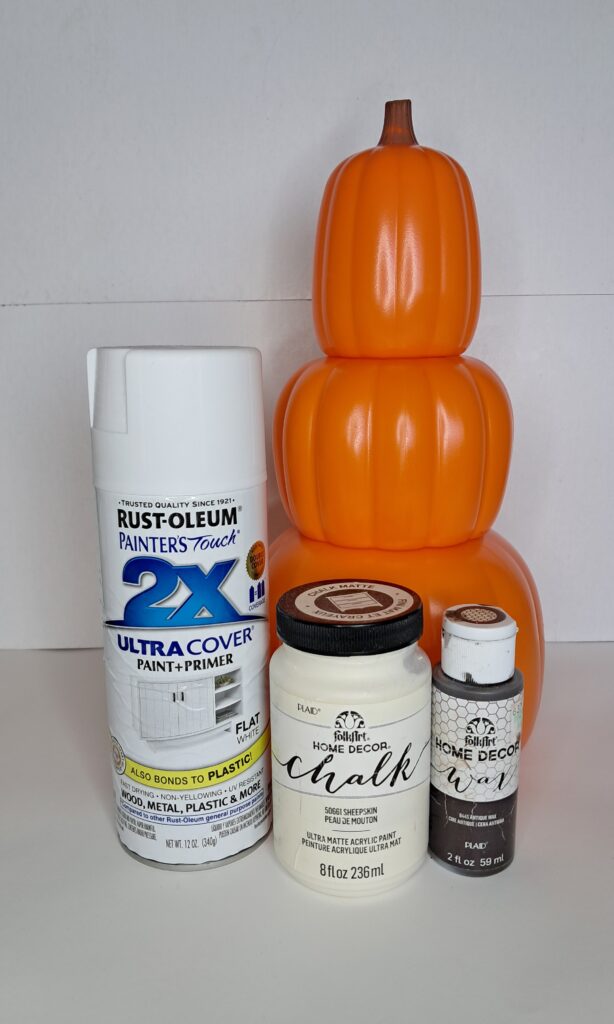
Supplies:
Pumpkin Stack, 12″ (Dollar Tree)
Rust-Oleum 2X Paint & Primer Spray, White (Hobby Lobby)
Folk Art Home Decor Chalk Paint, Sheepskin (Hobby Lobby)
Folk Art Home Decor Antiquing Wax (Hobby Lobby)
Rust-Oleum 2X Sealer Spray, Clear Matte
Spanish Moss (Michaels)
Florals (Hobby Lobby)
Greenery (Hobby Lobby)
Wood Slice (Hobby Lobby)
Grapevine Wire (Michaels)
Pip Berry Garland (Dollar Tree)
E6000 Industrial Adhesive (Michaels)
Gorilla Glue Hot Glue Sticks (Michaels)
Hot Glue Tool
Wire Cutters
Sponge
Paint Brush
How To:
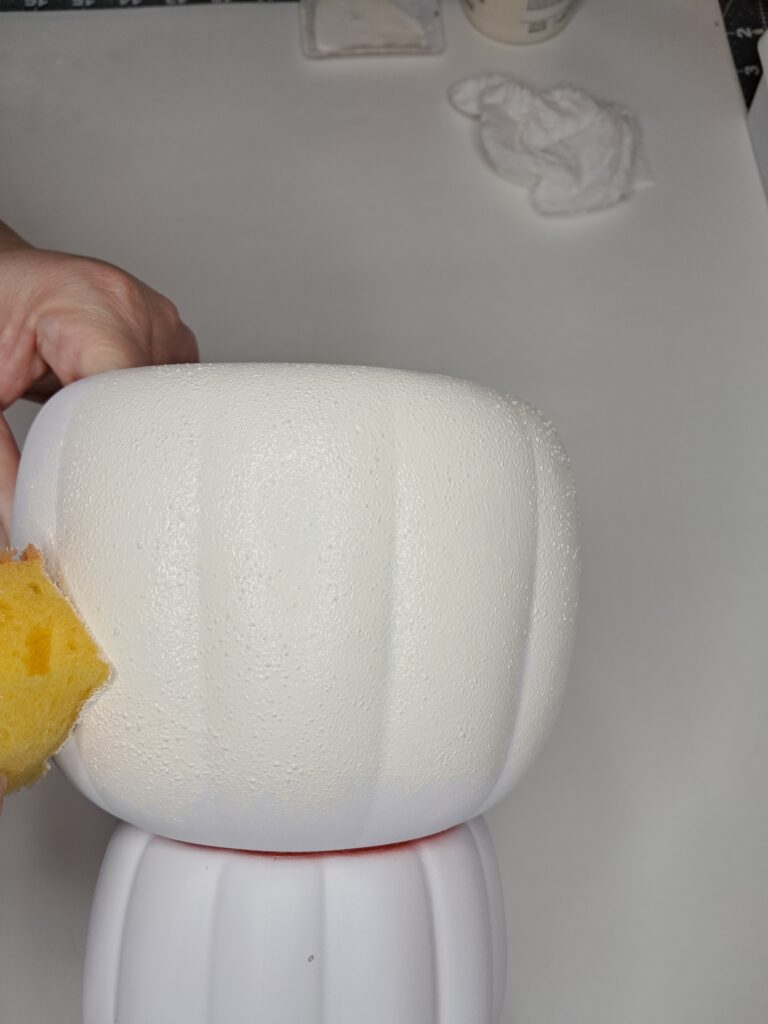
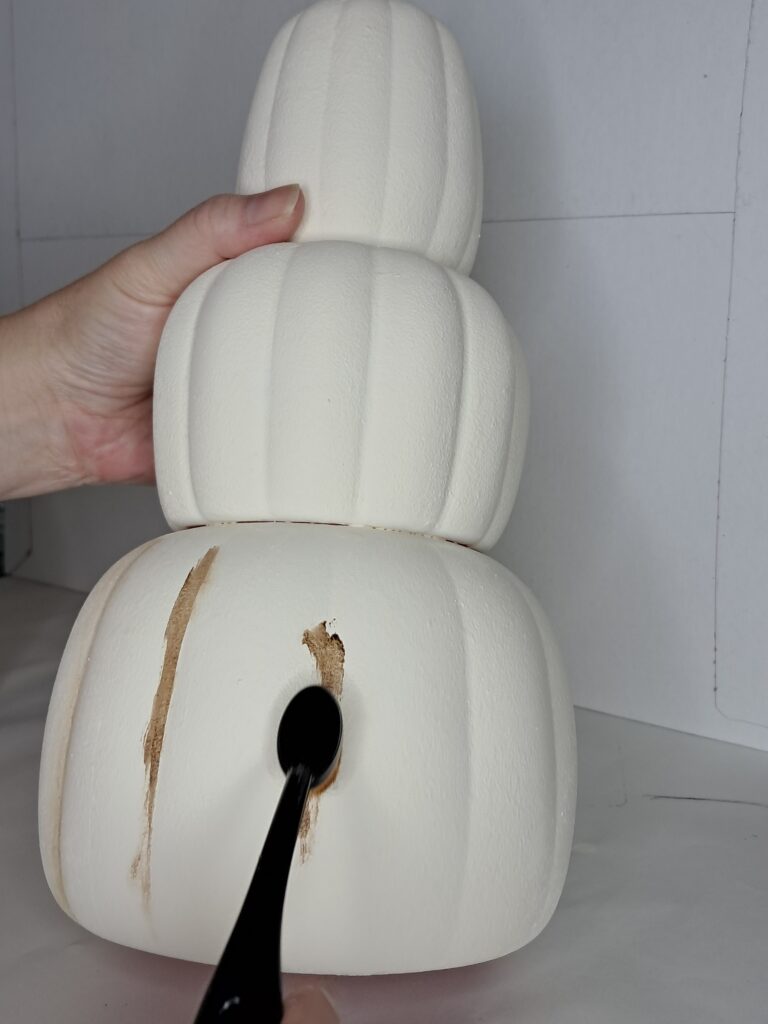
I began by adhering the pumpkins together using E6000. I then used white paint/primer to spray the stack with two coats. I wanted to cover up the orange and ensure that the chalk paint would properly adhere to the plastic in the next step.
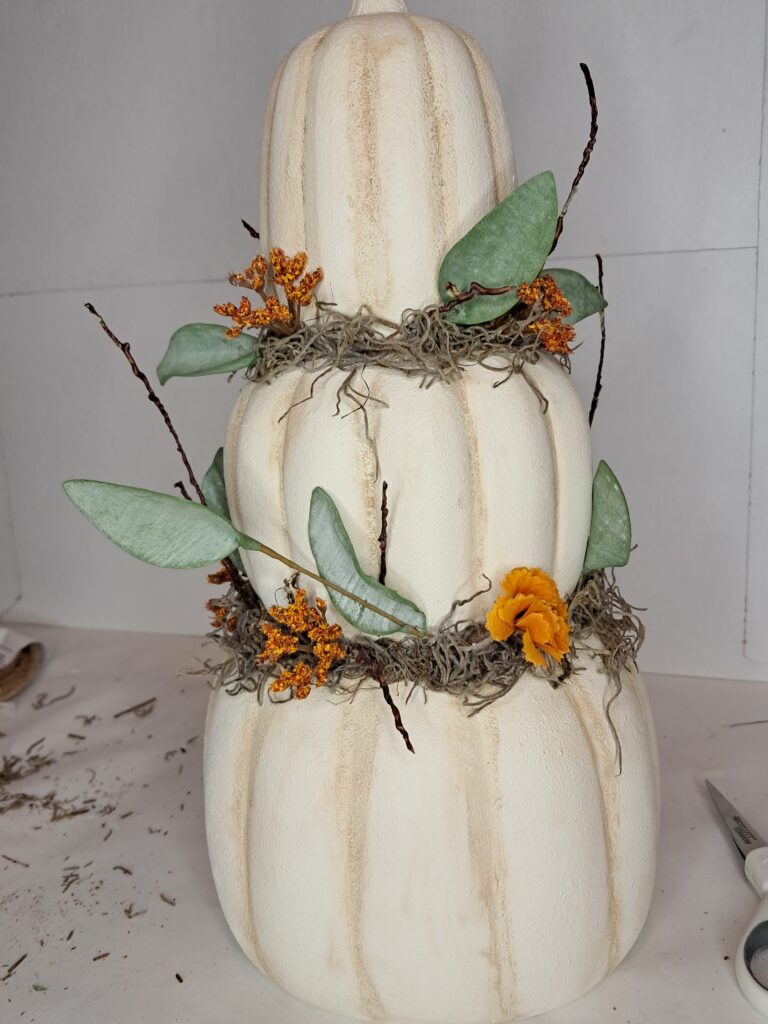
Once the stack was fully dry, I painted with chalk paint in Sheepskin using a sponge. Pouncing the sponge achieved a textured finish. This step only required one coat.
To give the stack more dimension, I added antiquing wax to the grooves of each pumpkin. I used a soft brush to add the wax, then I wiped off the excess wax with a baby wipe. I allowed the pumpkins to thoroughly dry, and then sprayed a coat of clear matte sealer.
Using hot glue, I adhered Spanish moss in between the pumpkins. I also added greenery, flowers, and tendrils. The tendrils pictured below came from the bush of greenery that I used.
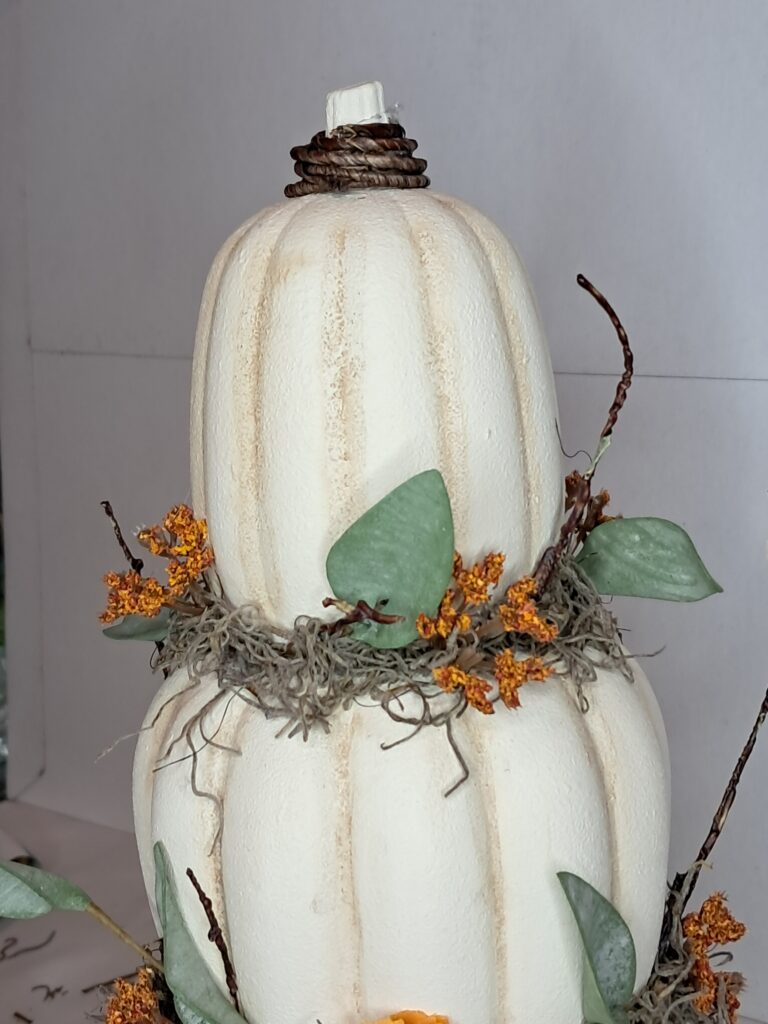
To make the stem of the top pumpkin more substantial, I used grapevine wire. It is a wrapped floral wire that looks like grapevine. I slowly wrapped the wire and glued it to the stem using hot glue until the stem was covered. I wrapped the same wire around a paint brush to make curled tendrils to add to the stack.
As I looked at the makeover, I decided that the stack really needed a base to sit on. I dug through my craft stash and tried several things. I tried a small grapevine wreath and a couple of rectangular wood plaques, but none of them were the right shape, size, or look. I came across a round wood slice and it was perfect! I used E6000 to glue the stack to the perfect base.
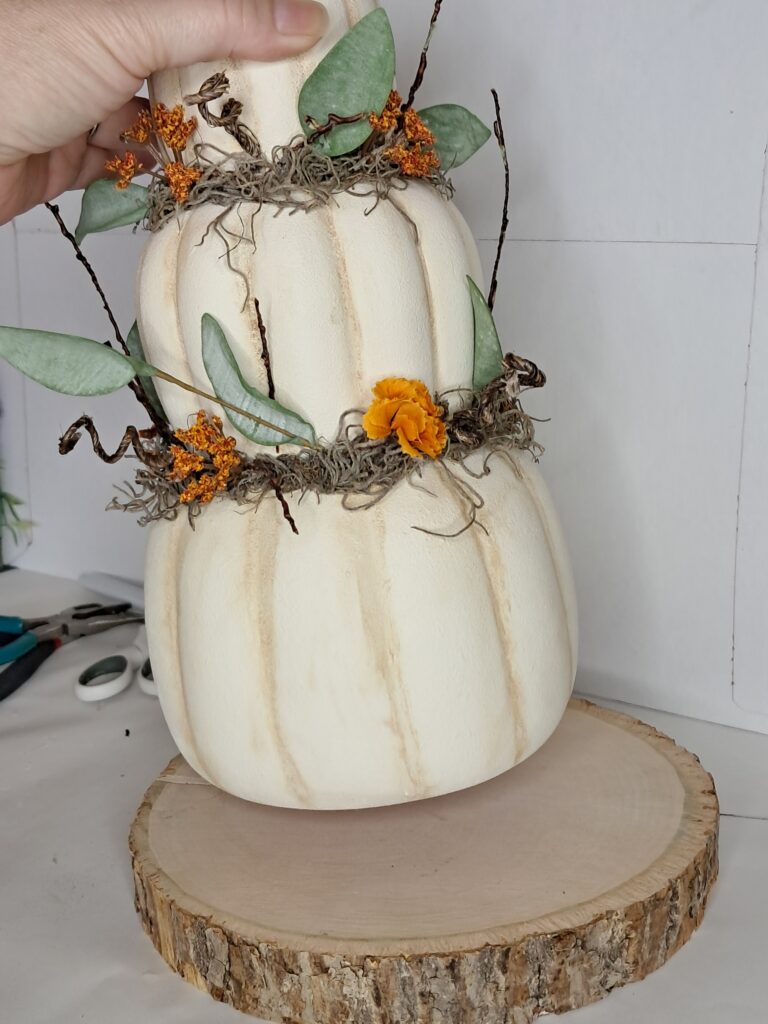
I added Spanish moss, greenery, and florals to the base of the pumpkins. I also used orange pip berry wire to add more curled tendrils to the stack. The makeover was now complete! Would you ever guess this started as a dollar store find?