
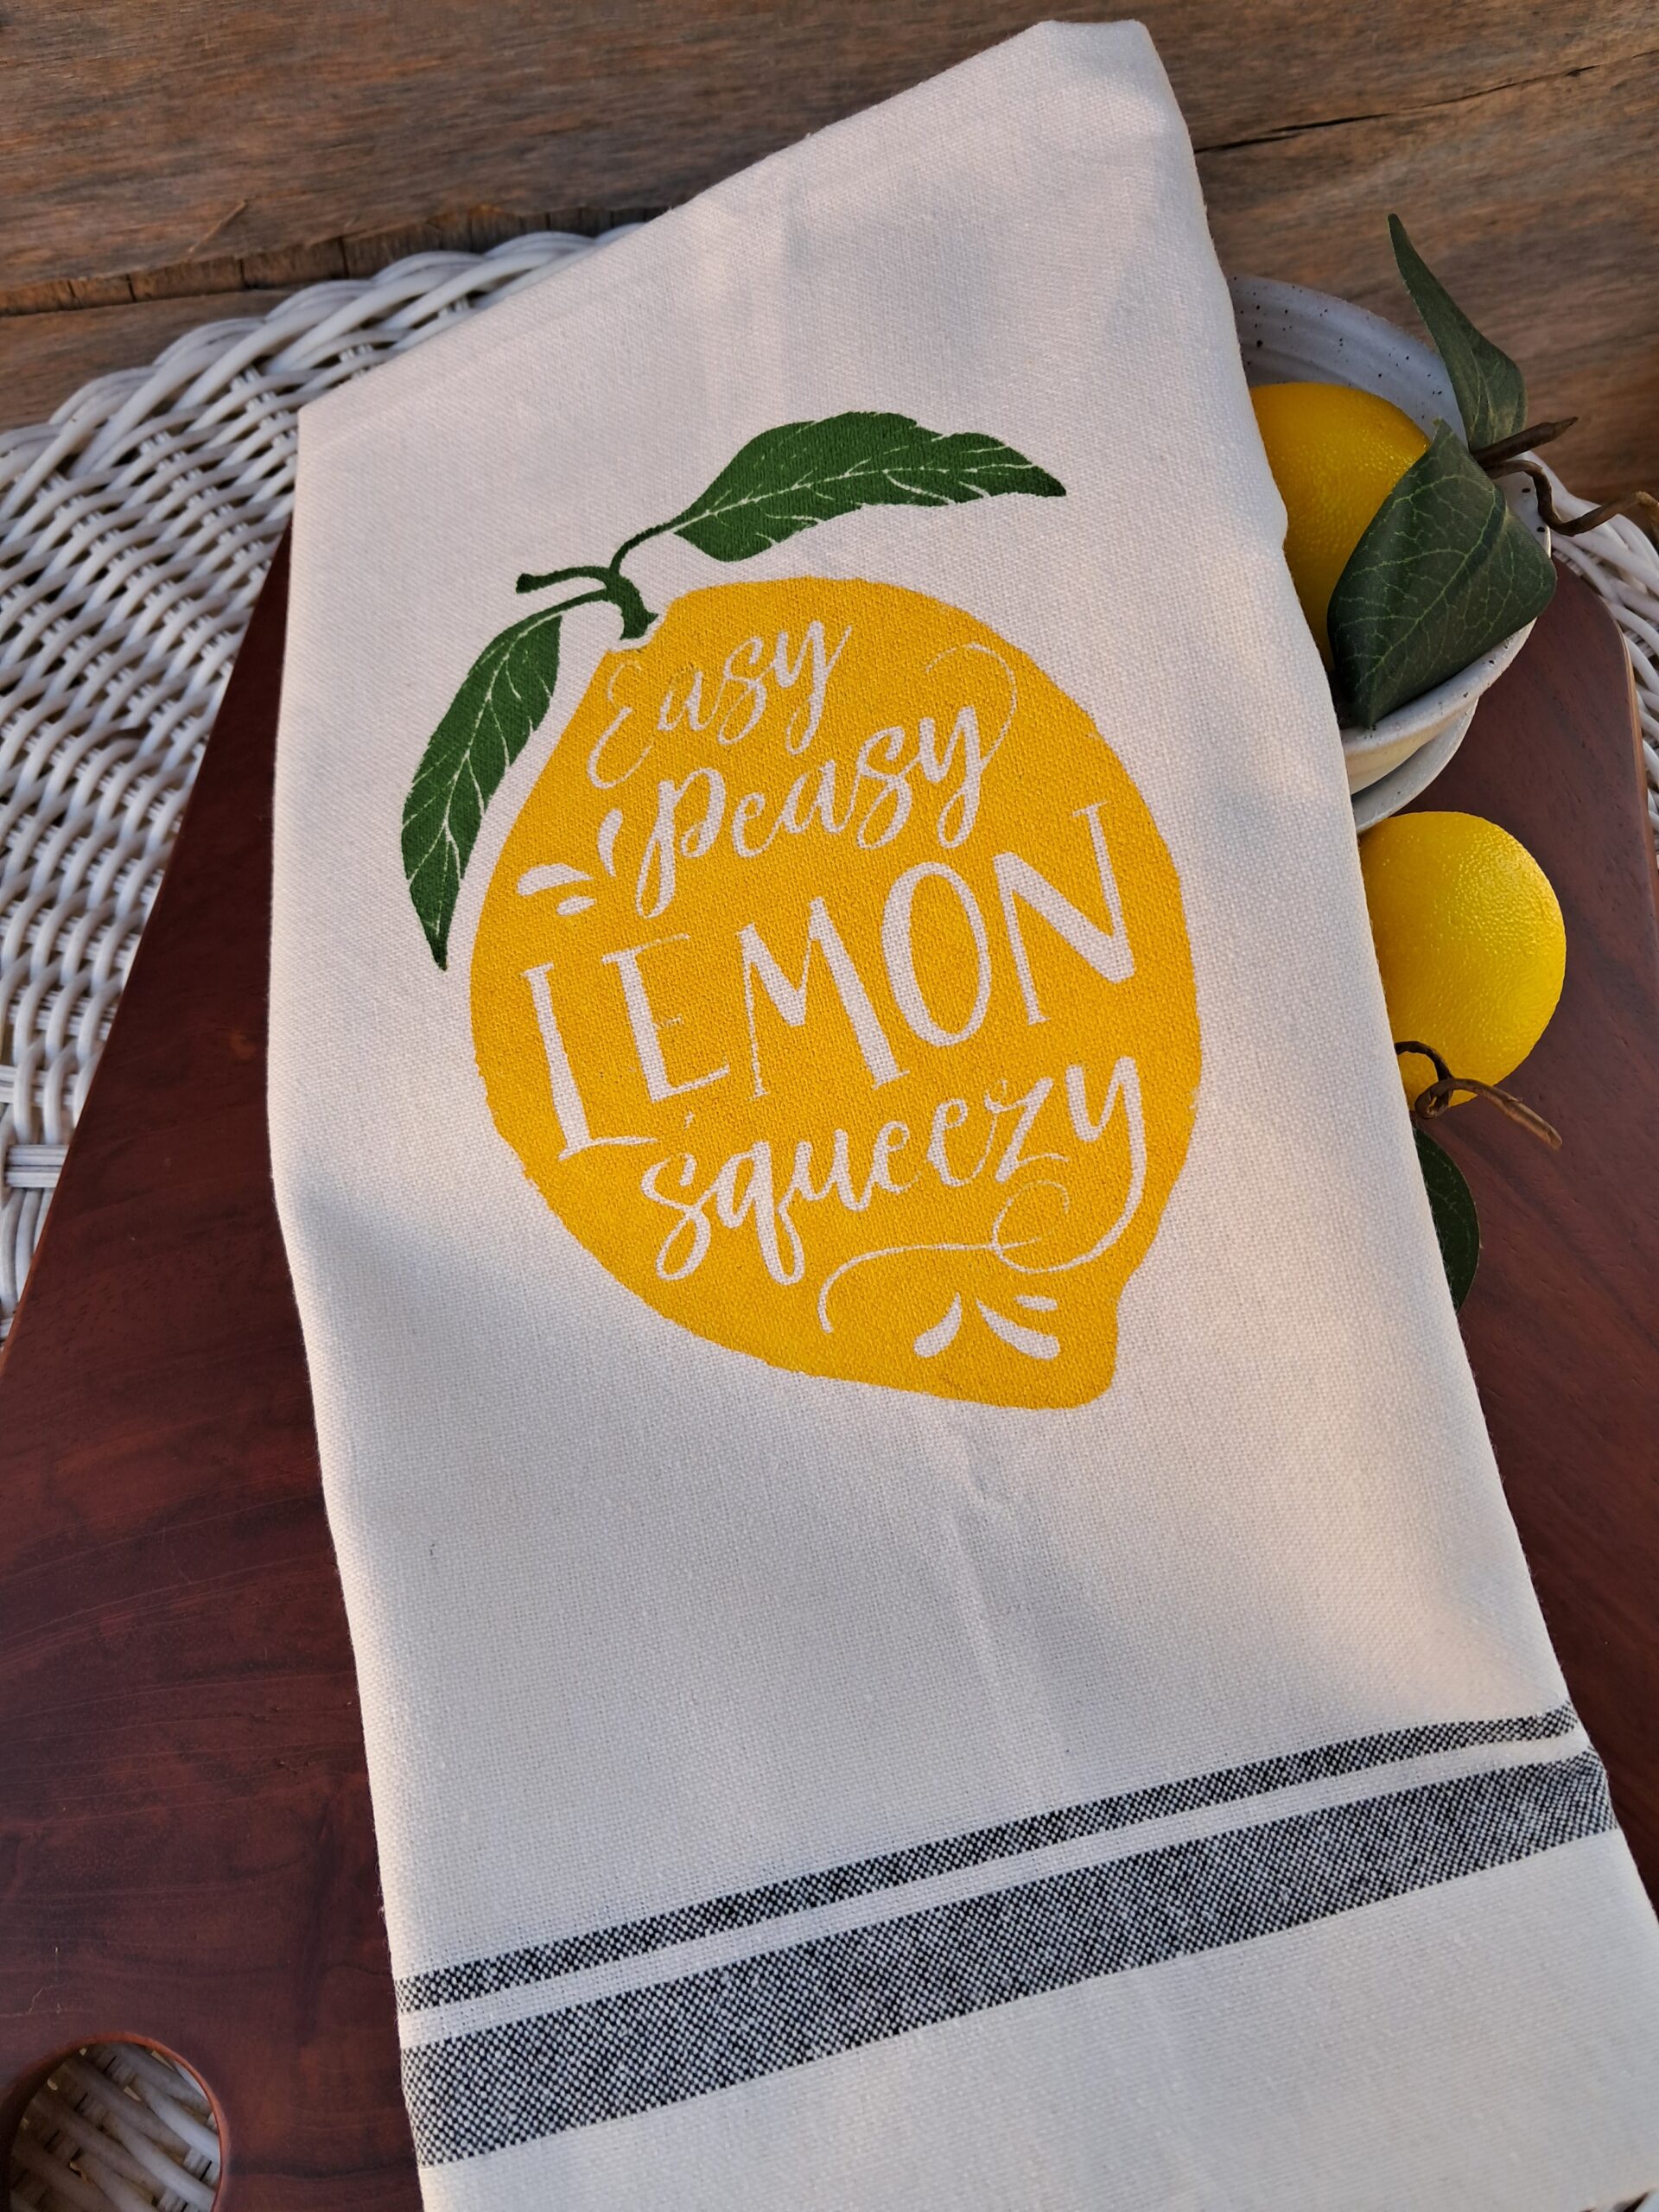
Lemon Tea Towel
Home decor trends often take their cue from nature and the seasons. In spring and summer, fruit-themed pieces are everywhere—just stroll through your favorite store and you’ll see watermelon, strawberries, and of course, lemons. These fruits are a seasonal favorite for a reason! Coming into the summer season, a lemon-themed tea towel seemed perfect for the kitchen.
The video tutorial below shows the process of making the lemon tea towel, or you can scroll to see the step-by-step pictures and read the how-to!
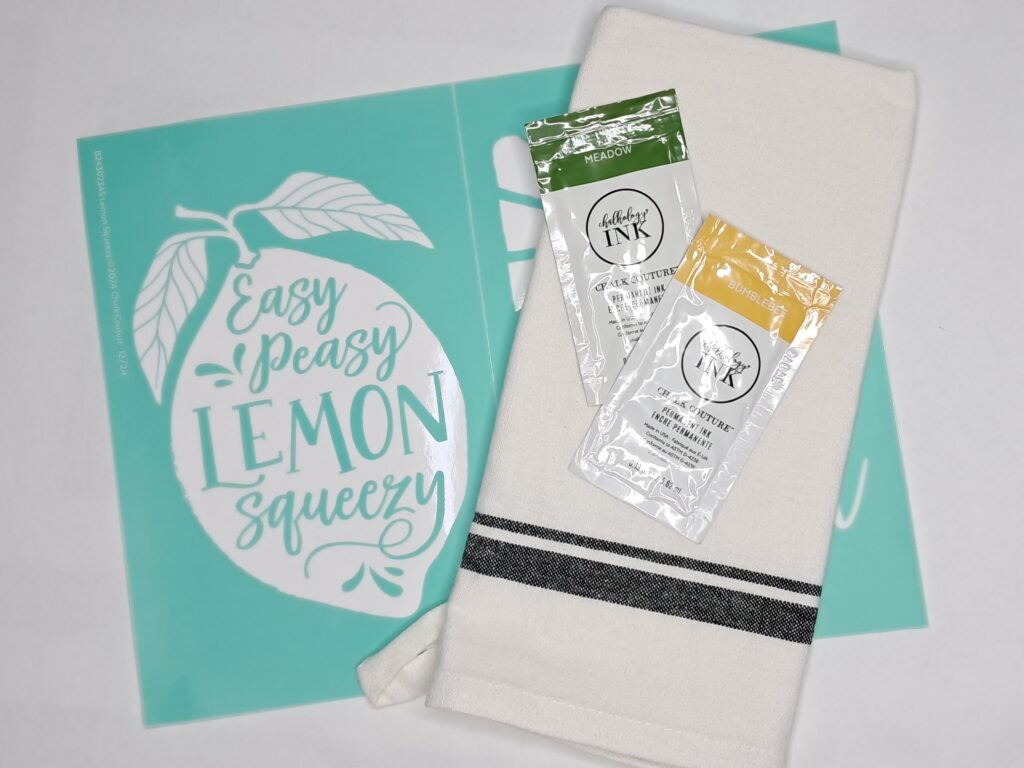
Supplies: Tea Towel (Aunt Martha’s Retro Stripe Towel) Silk Screen Mesh Stencil/Transfer (Chalk Couture Lemon Squeezy) Permanent Ink (Chalk Couture Bumble Bee and Meadow) Adhesive Mat Parchment Paper Household Iron
How-To: Start by placing your tea towel on an adhesive mat. This keeps the towel from shifting as you work and also protects your surface. If any permanent ink seeps through the fabric, it will land on the mat—not your table—and the mat is easy to clean.
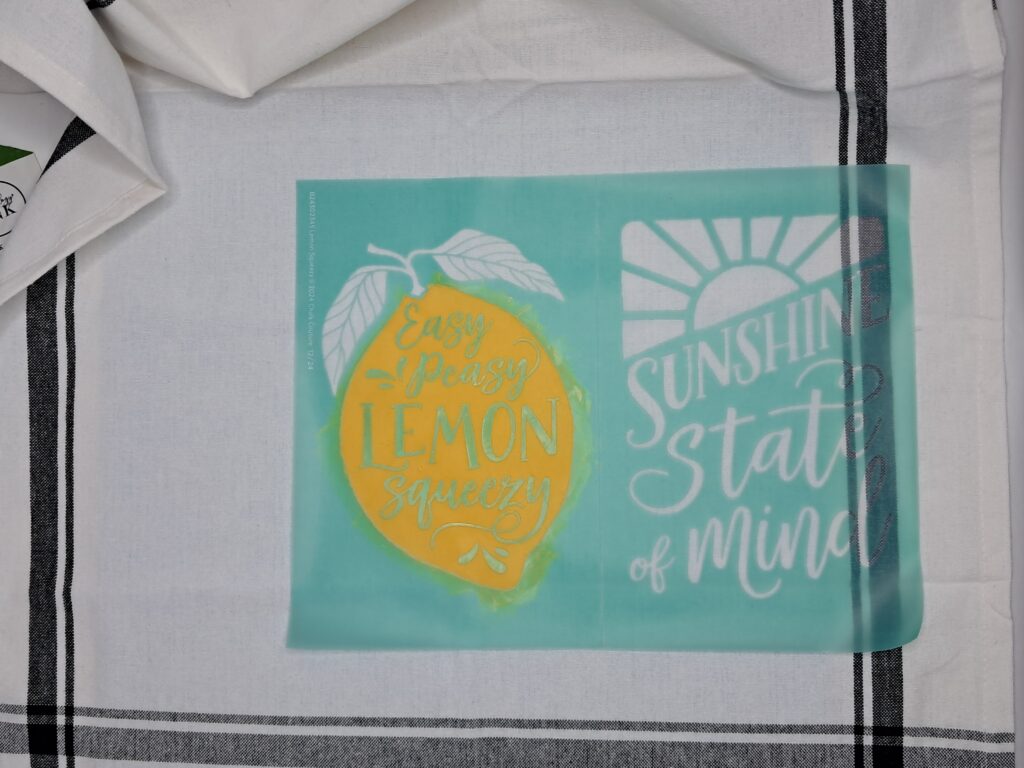
Next, center the lemon silk screen mesh stencil onto the towel. The stencil is adhesive, so it sticks in place easily, and it’s reusable if cleaned properly. Apply Bumble Bee ink on top of the lemon design. Using a squeegee, gently glide the ink over the mesh to transfer the lemon image onto the towel. Repeat the process using Meadow ink for the leaves.
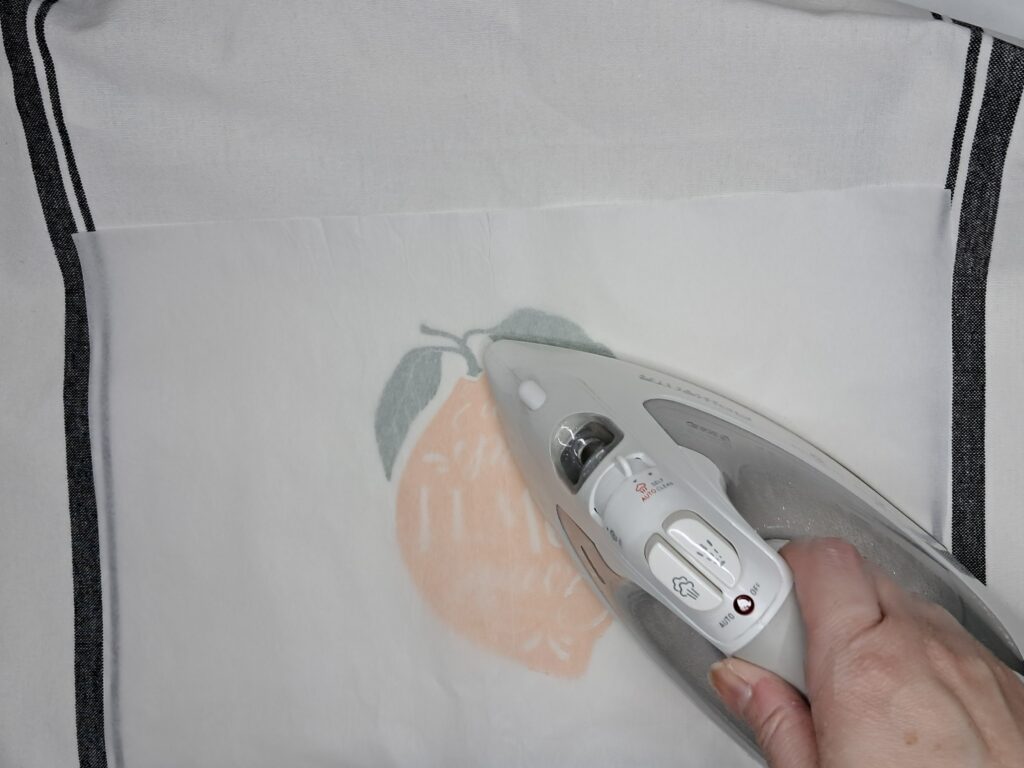
Once the ink is completely dry—I recommend letting it dry overnight—it’s time to heat set it so the design becomes permanent. Place a piece of parchment paper over the design to protect it, then use a household iron on the cotton setting. Iron the front side for about three minutes. Then flip the towel over, place the parchment paper on the back, and iron that side for another three minutes. That’s it! Your custom tea towel is now ready to use, wash, or gift.


What a cool tutorial, Michelle!!
Hugs and your website is looking so nice!!
I’m so glad you enjoyed it Sharon! Thanks for the read!