
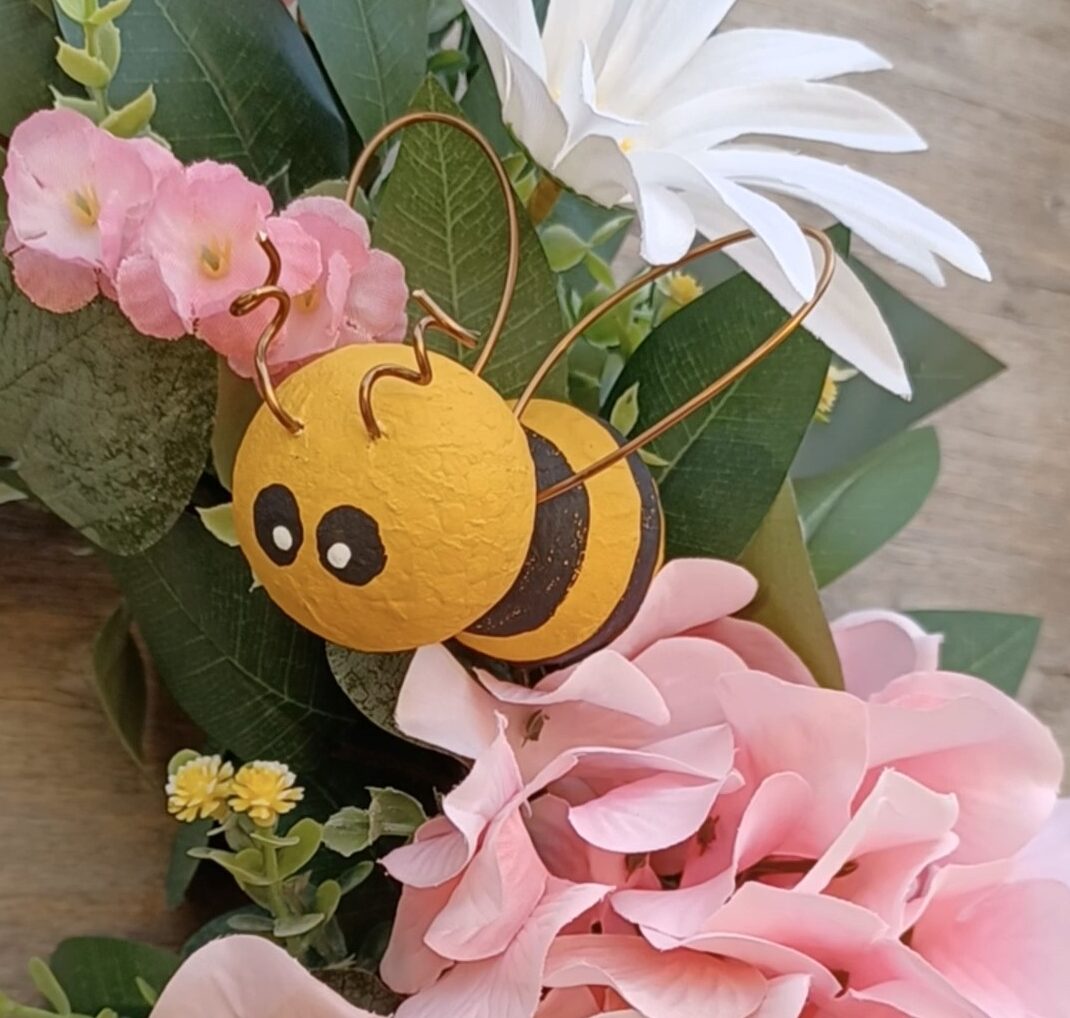
Whimsical Bee
With nature being so influential on decor trends, bees are popular accents during the warm seasons. This bee is a fun embellishment that can be added to a floral arrangement or wreath for a whimsical touch. With just a few supplies, you can create this adorable bee to add charm to your spring and summer decor.
The video tutorial below shows the process of making the bee, or you can scroll to see the step-by-step pictures and how-to!
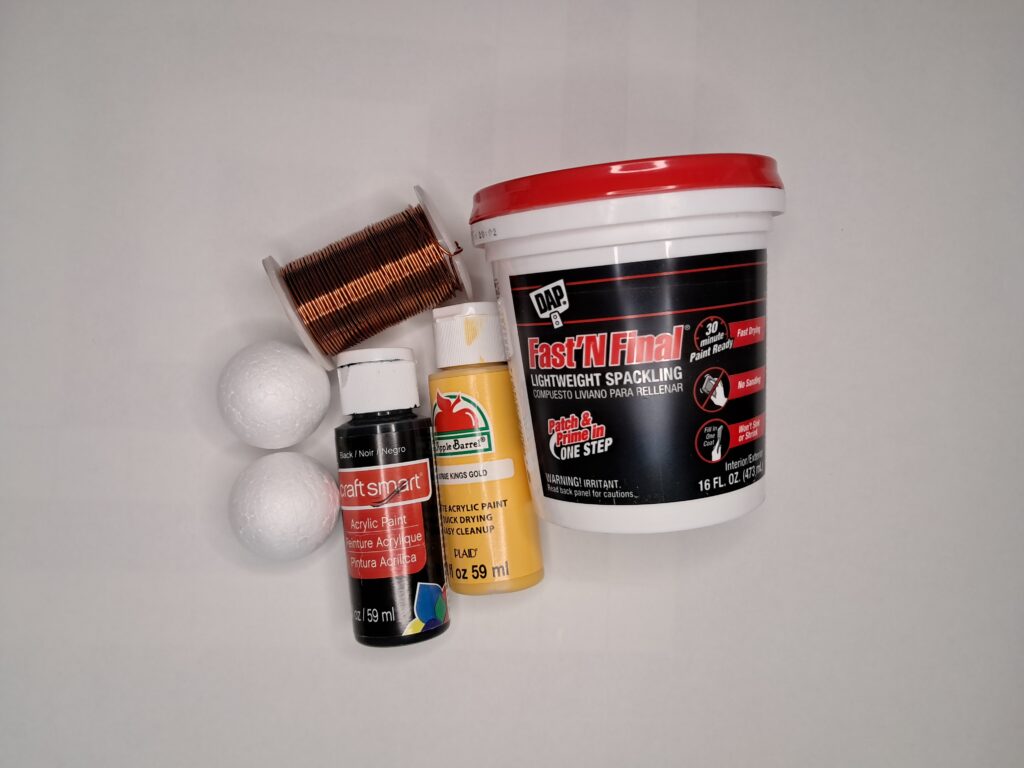
SUPPLIES:
The supplies used were two 1.5” foam balls, lightweight spackle (Dap), 18 gauge wire, yellow acrylic paint (Apple Barrel King’s Gold), black acrylic paint (Craft Smart Black), and toothpicks.
How To:
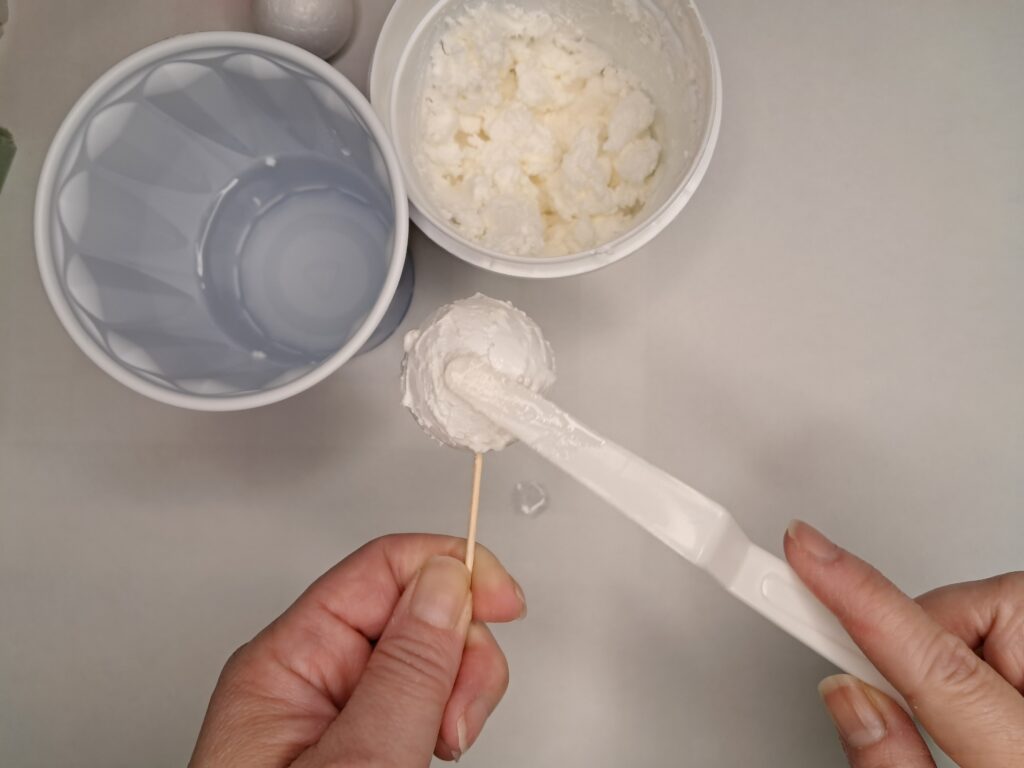
I added the lightweight spackle to cover up the texture of the foam balls. This step can be skipped if you prefer to keep the foam texture. In order to work on the foam balls, I inserted a toothpick into each one. I held the toothpick and added the spackle using a plastic palette knife. I dipped the knife into water to help smooth out the spackle. I inserted the other ends of the toothpicks into a floral foam block to allow the spackle to dry thoroughly.
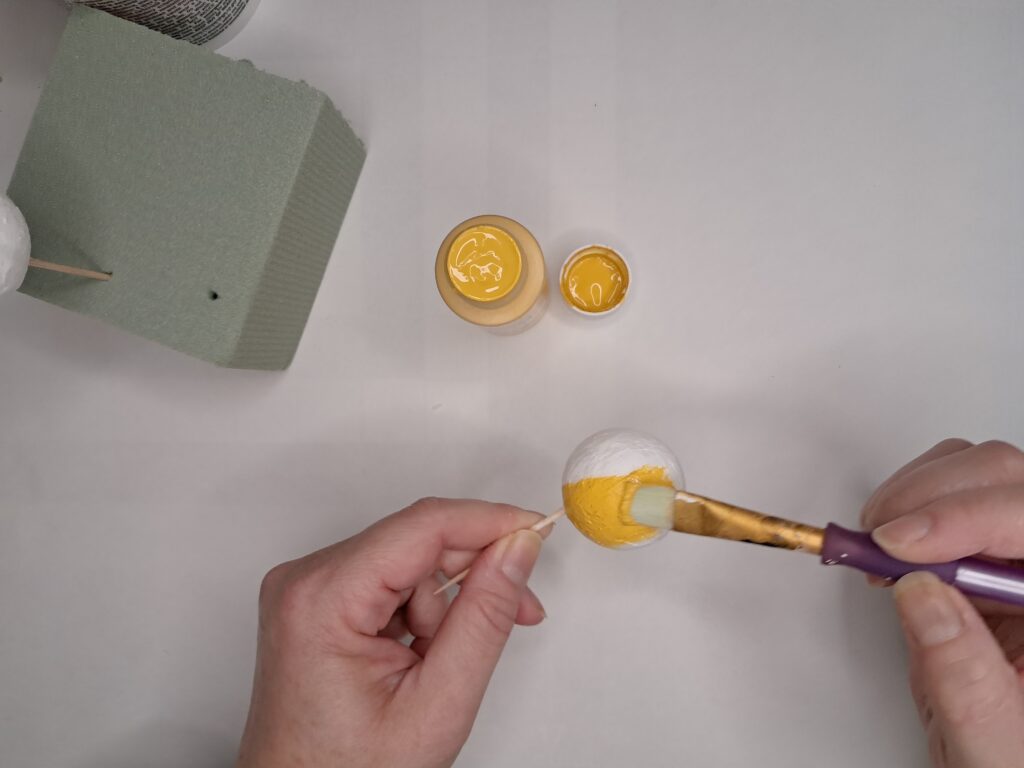
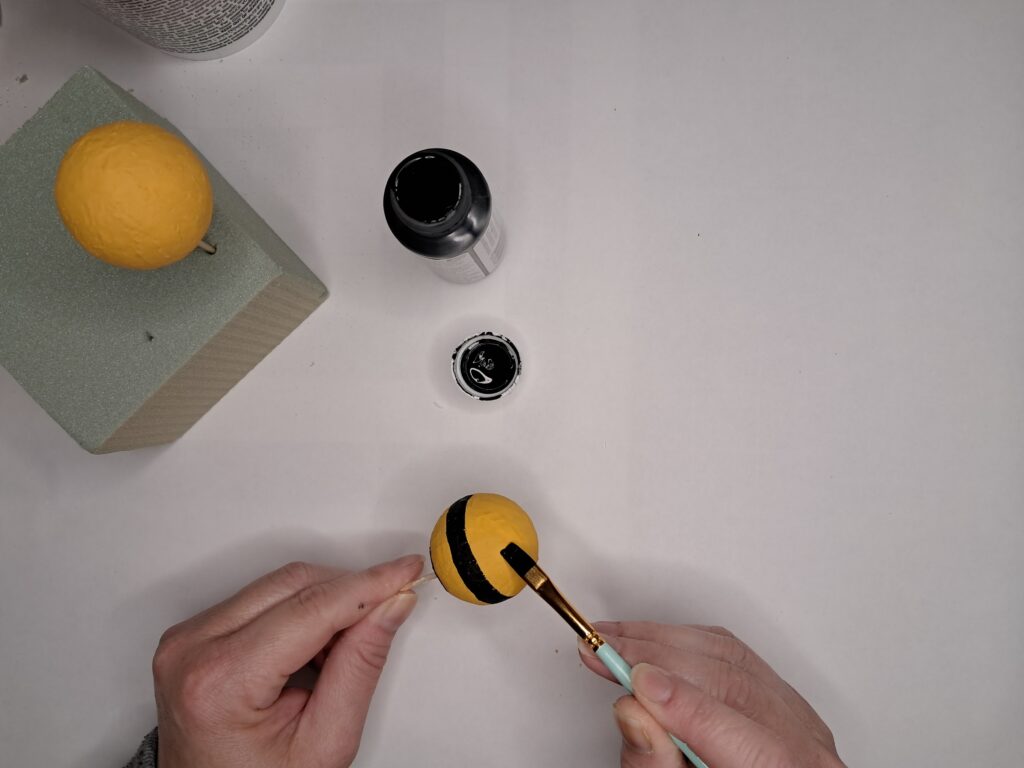
Once the spackle was dry, I painted each ball with two coats of yellow paint. After the yellow paint was dry, I painted black stripes on one of the balls. I twirled the ball with the toothpick while holding a flat brush steady against the ball. This striped ball would be the body of the bee.
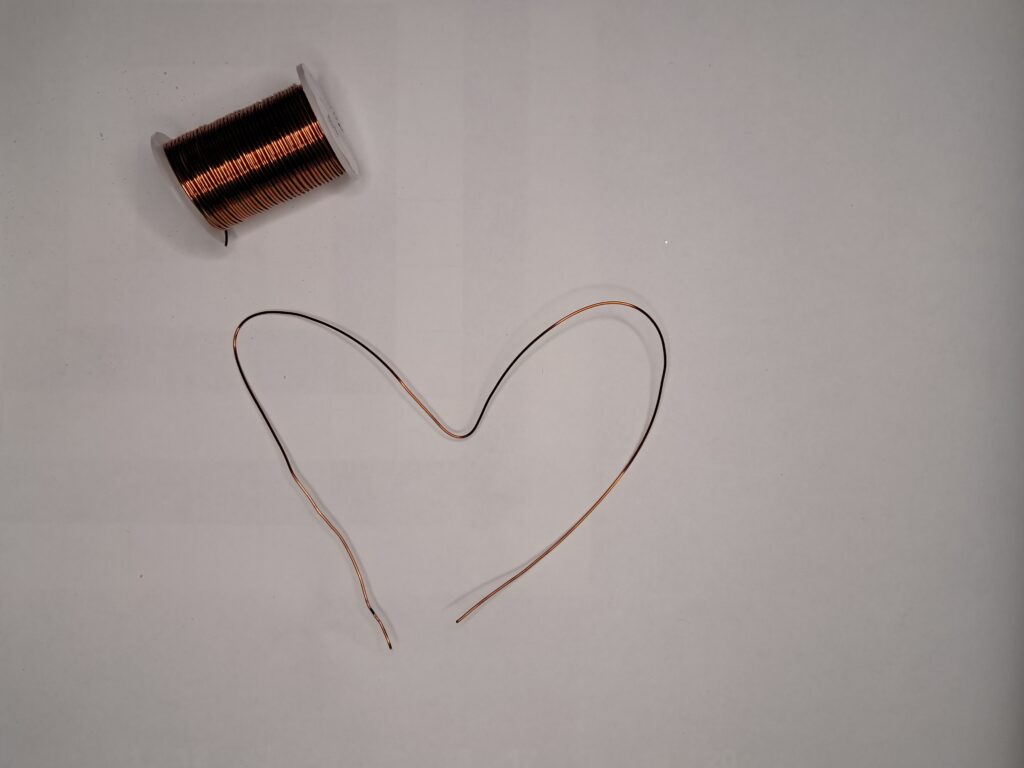
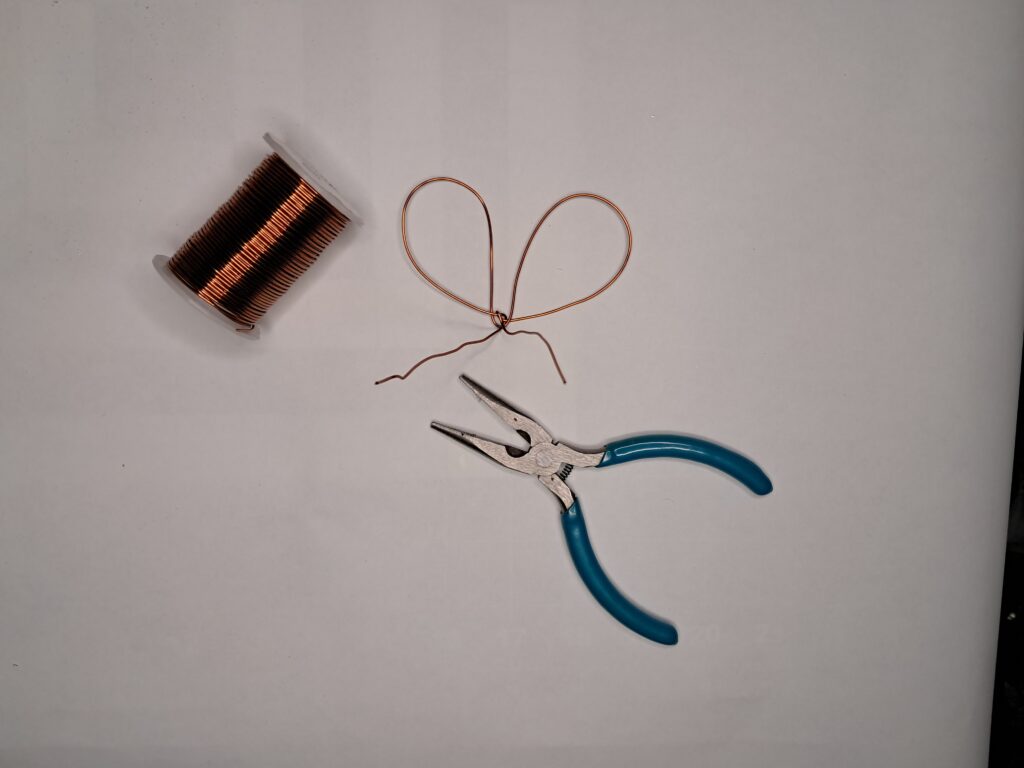
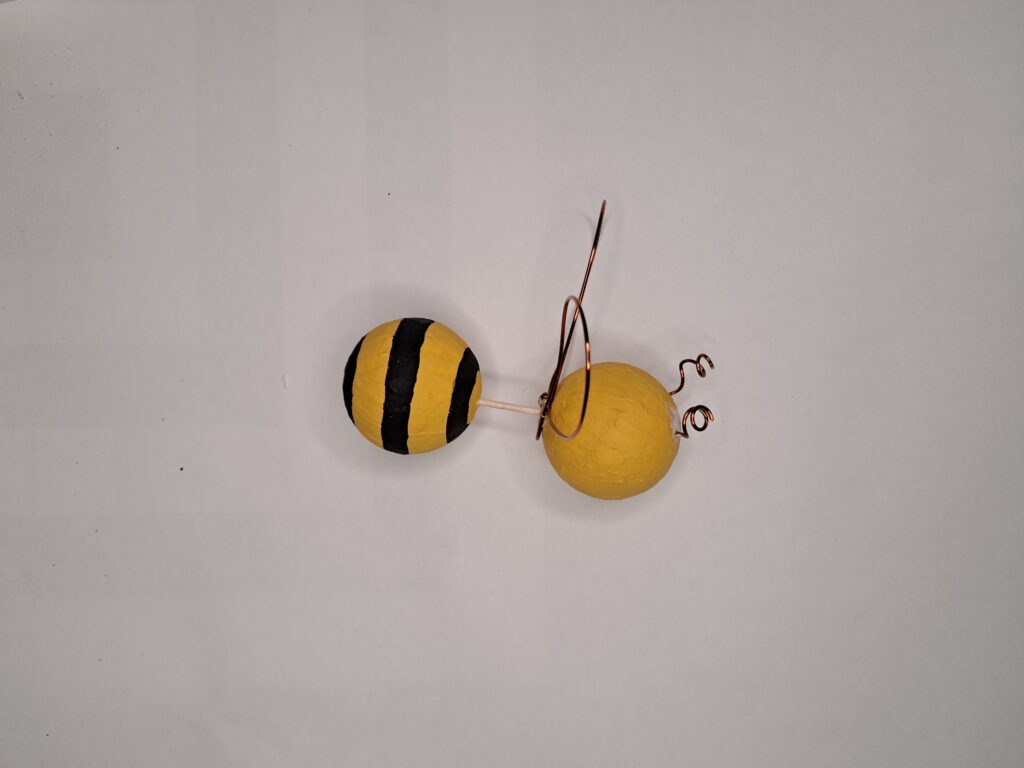
To construct the wings of the bee, I cut roughly 20” of wire. I then formed a heart shape with the wire. Crossing and looping the loose ends of the wire around the “dip” of the heart, resulted in two wings.
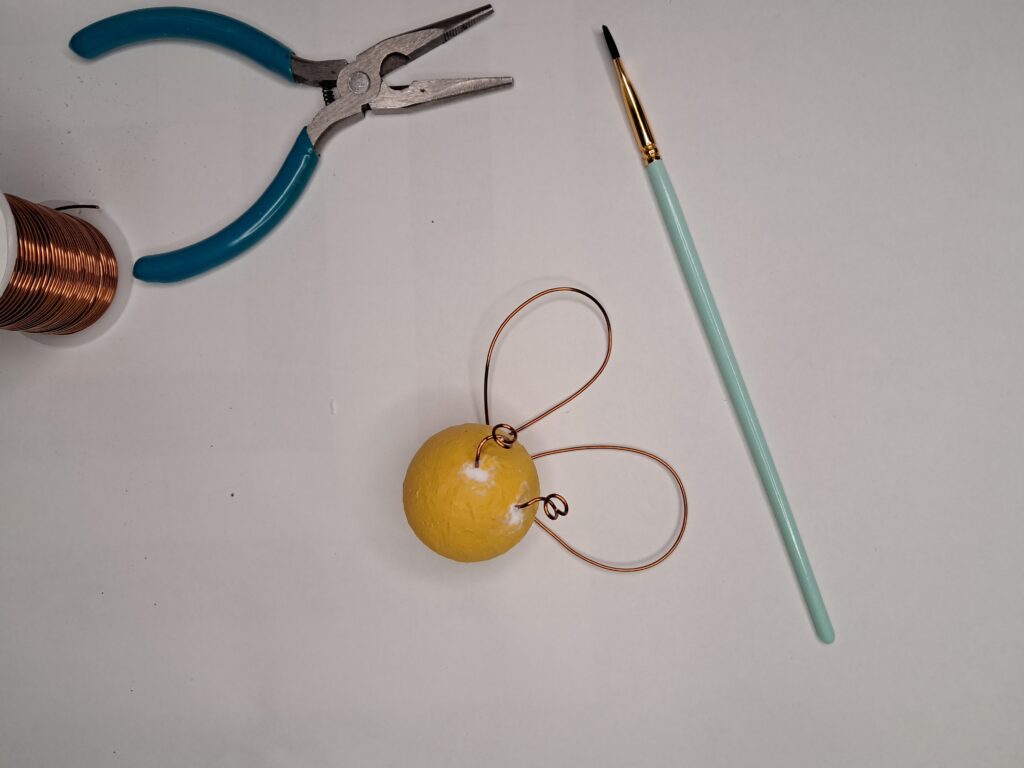
I inserted the loose ends of the wire into the solid yellow foam ball, or the head of the bee. The two loose ends would be the antenna of the bee. Pushing the antenna through the head caused some of the foam to tear away. Using the palette knife and spackle, I patched up the foam around the antenna. I touched up the head with yellow paint once the spackle dried. To finish the antenna, I wrapped the wires around the end of a small paint brush to curl them.
To finish putting the bee together, I used a toothpick to connect the head and the body. I applied hot glue to both ends of the toothpick then inserted into each ball, pushing the head and body together.
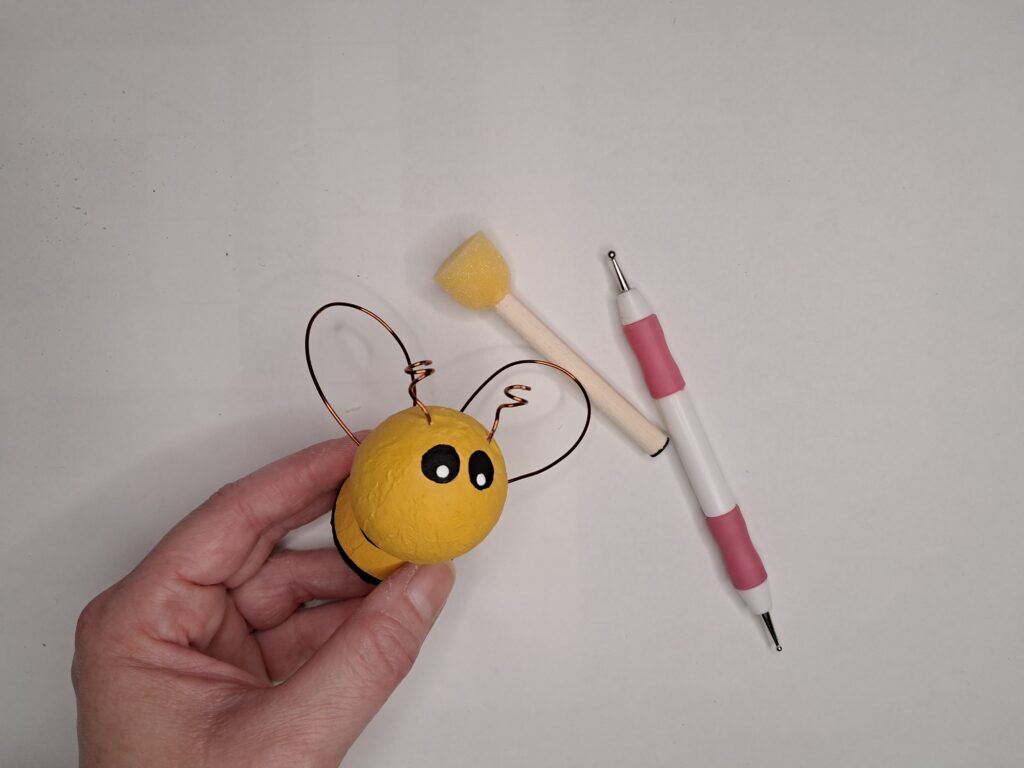
The finishing touches to the bee were the stinger and the eyes. For the stinger, I bent a small piece of wire in half then glued and inserted it into the back end of the bee. For the eyes, I first painted two black circles on the face using the wooden end of a sponge dauber. I dipped the wooden end into the paint, then dabbed them onto the face. When the black paint was dry, I added small white dots to each eye using an embossing tool and white paint.
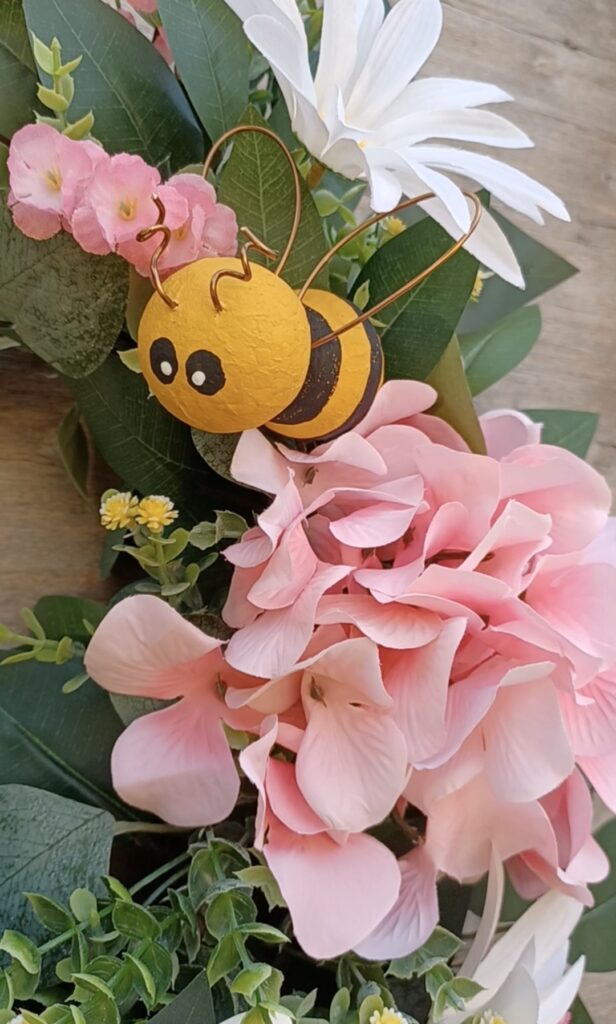
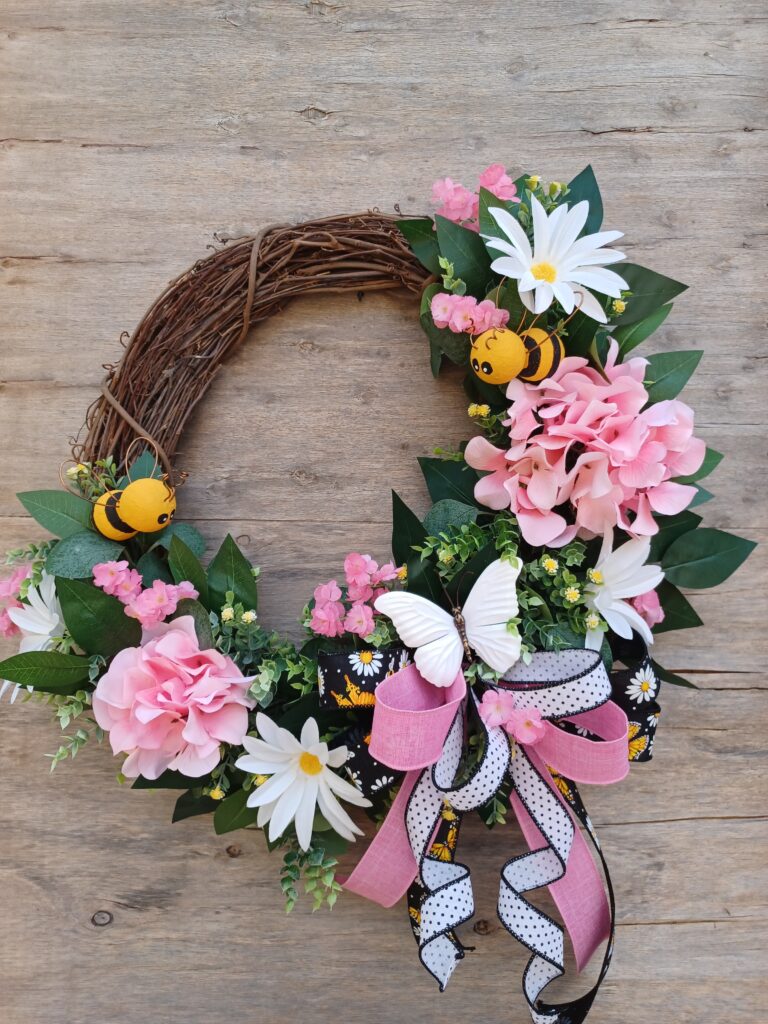
I added two bees as embellishments to a wreath for a whimsy touch. Will you try making one of these cuties? Let me know in the comments!

Great project! Clear instructions!
Thanks so much! I’m glad you enjoyed this one🤗